

How to Choose the Right Spotlight Beam Angle
Spotlight beam angle determines the spread of a light beam and affects the illuminated area on artwork, decorative objects, interior shelves, and display spaces. At the same installation distance, a 15° beam angle can produce a significantly smaller illuminated area than a 36° or 55° beam angle. Therefore, selecting the right spotlight should begin with the dimensions of the object and the desired lighting effect rather than relying solely on wattage or fixture appearance.
Two common challenges in lighting design are spotlights that fail to illuminate an entire painting and light spilling beyond the intended object. These issues may occur when the beam angle is too narrow or too wide, or when the installation distance is unsuitable. For architects and lighting contractors, determining the surface dimensions, fixture position, aiming direction, and optical characteristics is essential before selecting a specific product model.
This article explains how to select the appropriate spotlight beam angle based on object size and installation distance, compares 15°, 24°, 36°, and 55° beam angles under identical conditions, and introduces specific spotlight models from the SVLight product range for lighting design reference.
What Is a Spotlight Beam Angle?
Spotlight beam angle describes the angular spread of the light beam based on the optical characteristics of a luminaire. According to the Illuminating Engineering Society (IES), the beam angle is measured between two directions where luminous intensity reaches 50% of its maximum value, within a plane passing through the nominal beam axis.
A narrow beam angle generally concentrates light over a smaller area, while a wider beam angle provides broader coverage. However, this does not necessarily mean that every narrow-beam spotlight produces higher brightness or that every wide-beam spotlight delivers better uniformity. Actual lighting performance also depends on luminous intensity, lenses, reflectors, and the quality of the optical system.
What Is the Difference Between Beam Angle and Aiming Angle?
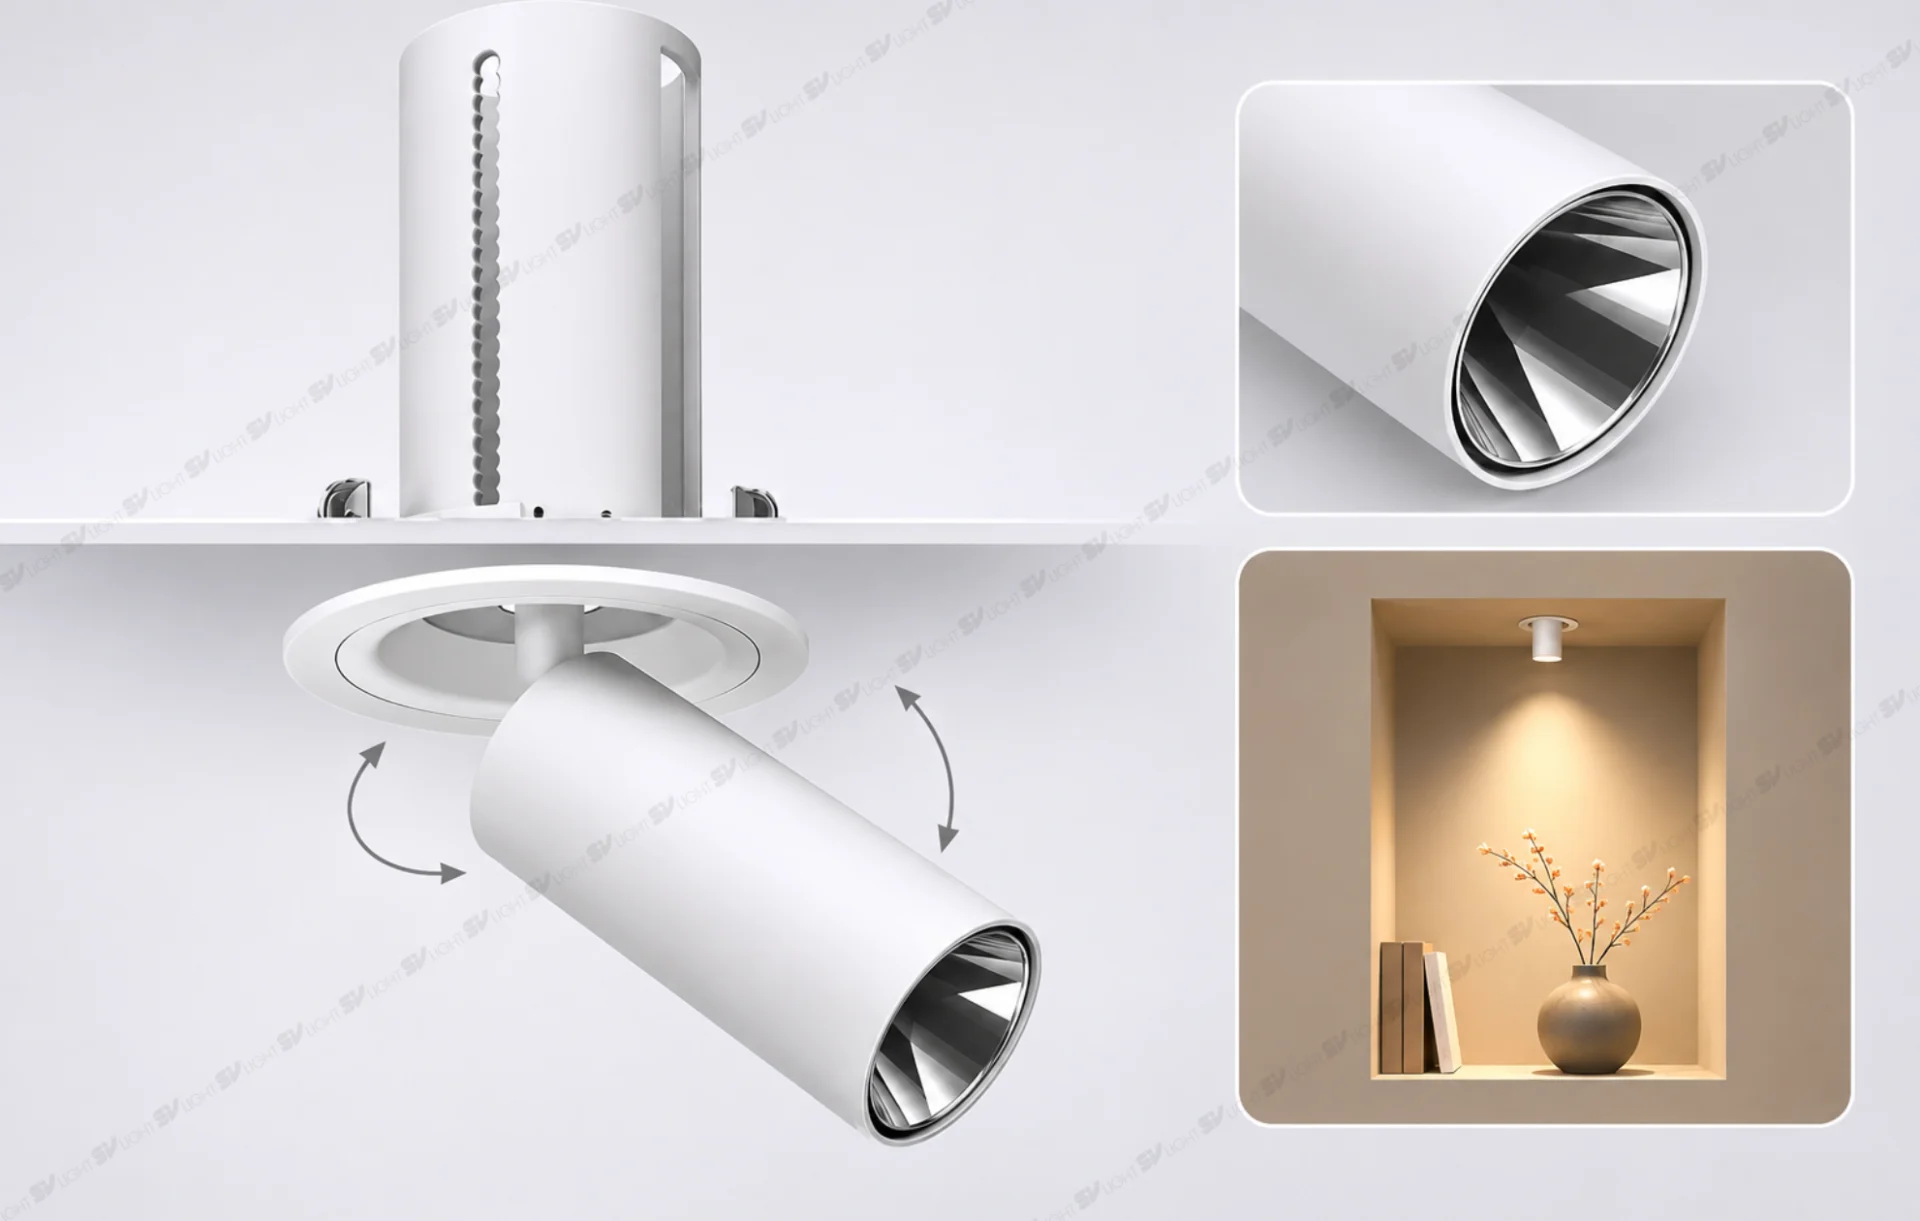
Beam angle and aiming angle are two different specifications. Beam angle refers to the spread of the light beam, whereas aiming angle describes the ability to rotate or tilt the luminaire head to reposition the illuminated area. A spotlight with a 24° beam angle does not necessarily have a 24° tilt adjustment range.
For example, when illuminating artwork mounted on a wall from a ceiling fixture, the light must be directed toward the correct position. If an unsuitable fixed spotlight is used, the illuminated area may miss the intended target even when the beam angle matches the dimensions of the artwork.
Within the SVLight spotlight collection, the SVS-T0755 is an example of a directional adjustable spotlight. This 5W model offers beam angle options of 15°, 24°, 38°, and 50°. Its mechanical rotation and tilt ranges should be verified separately according to the actual product configuration.
How Does Beam Angle Affect the Illuminated Area?
Under identical conditions, with the light beam perpendicular to the target surface and the same installation distance, a wider beam angle produces a larger geometric beam diameter. Conversely, a narrow beam angle helps restrict the illuminated area around the intended focal point, making it useful for creating contrast with surrounding surfaces.
The diameter of the illuminated area can be estimated using the following geometric formula for a conical light beam:
D ≈ 2 × L × tan(θ/2)
Here, D represents the beam diameter, L is the distance from the light source to the illuminated plane along the beam axis, and θ is the full beam angle. This formula provides only a preliminary estimate for perpendicular illumination. When the beam strikes a surface at an angle, the shape of the illuminated area and the actual illuminance distribution must also be considered.
It is also important to distinguish the nominal beam diameter from the visible boundary of the light distribution. Light may extend beyond the calculated area. Therefore, accurate control of the spotlight beam angle requires reference to luminous intensity distribution curves or photometric data for the specific luminaire model.
Comparison of Common Spotlight Beam Angles
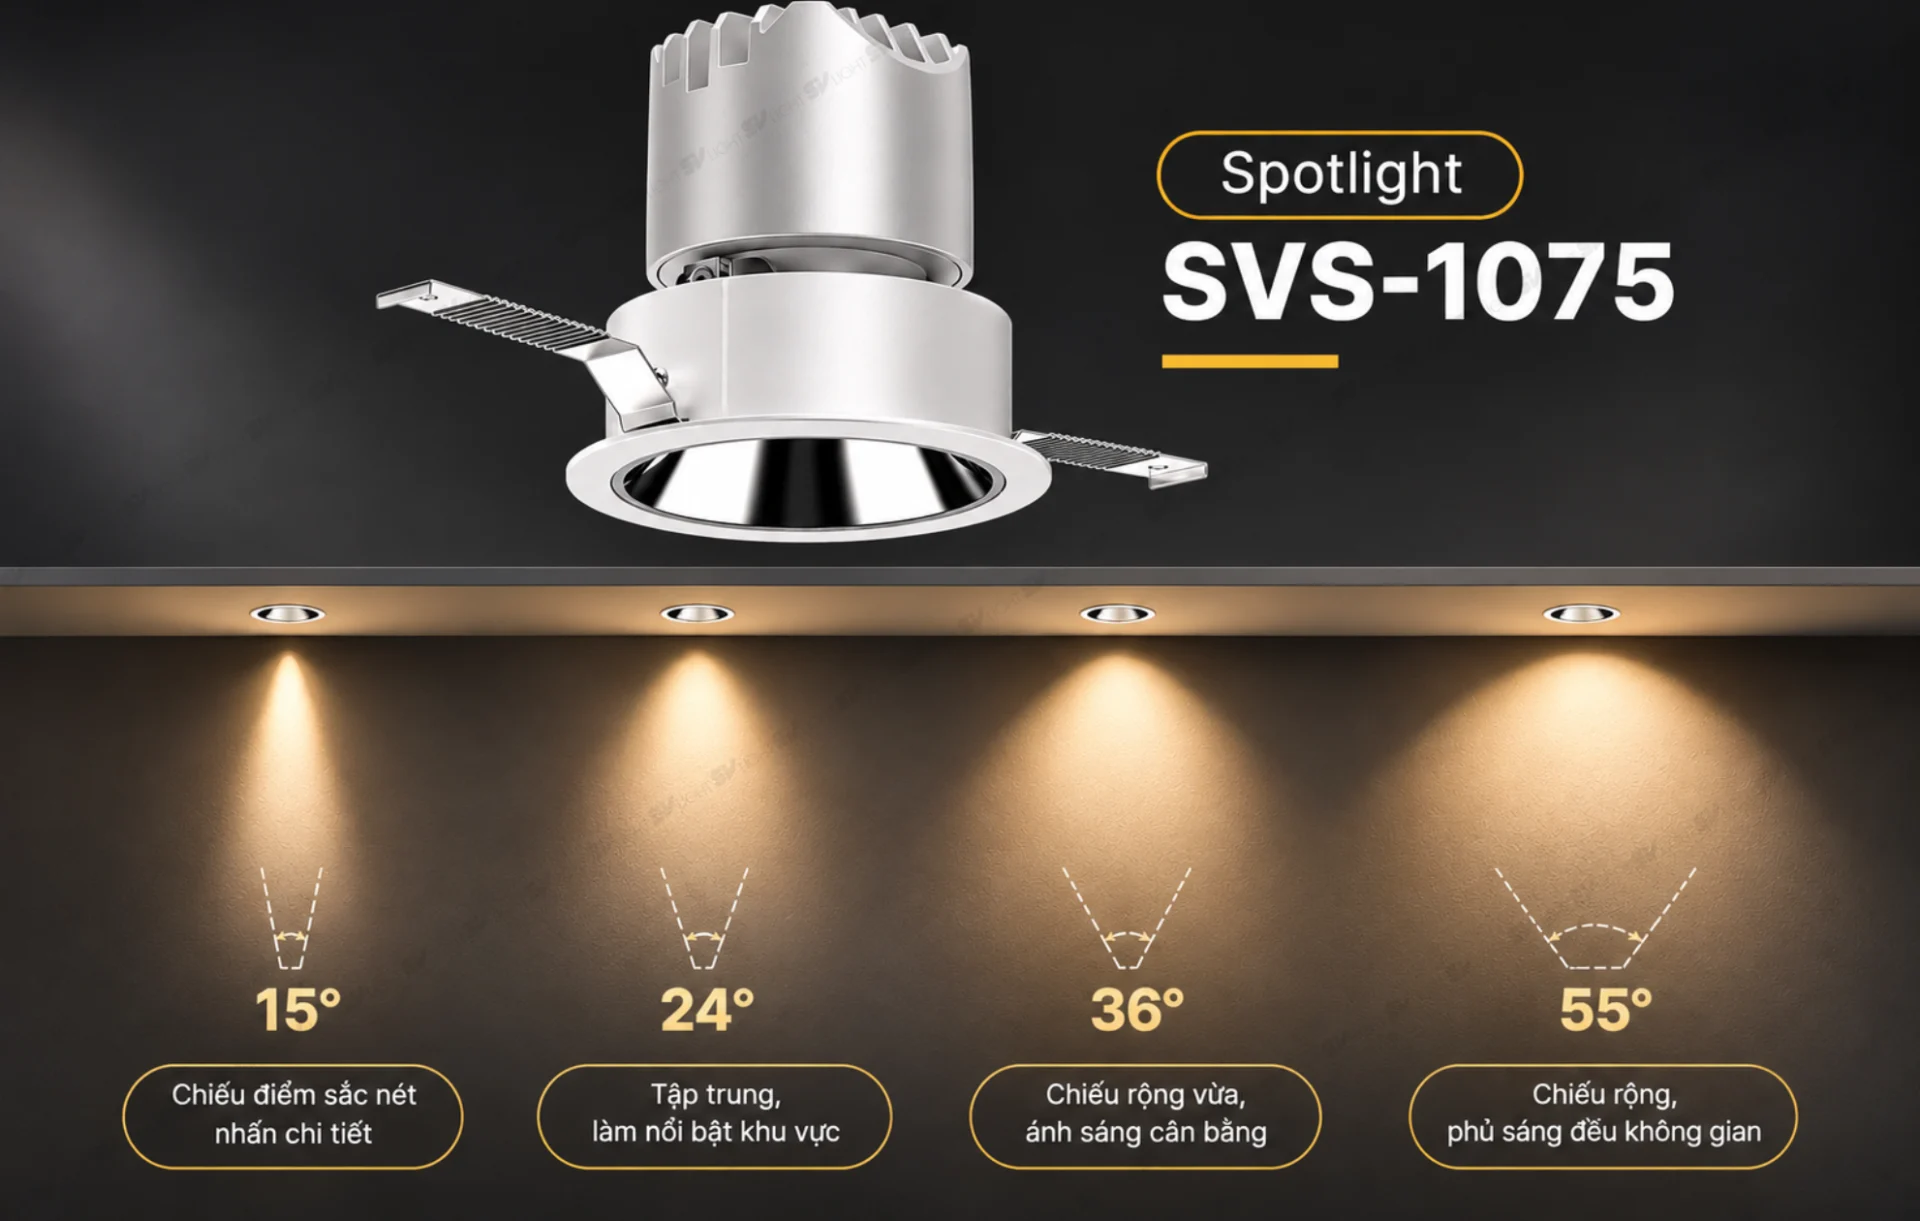
To compare spotlight beam angles clearly, consider four options: 15°, 24°, 36°, and 55°. All are evaluated under identical conditions: a 2 m lighting distance, a beam axis perpendicular to the target surface, and the same geometric calculation method.
These beam angles are available in the SVLight SVS-1075 Spotlight series. The product offers 10W and 12W power options, a color rendering index of Ra 97, and color temperature options of 2700K, 3000K, 4000K, and 5000K.
| Beam Angle | Diameter at 2 m | Characteristics | Potential Applications |
|---|---|---|---|
| 15° | 0.53 m | Narrow beam | Small details and individual focal points |
| 24° | 0.85 m | Moderately focused beam | Artwork and medium-sized objects |
| 36° | 1.30 m | Broader coverage | Large paintings and decorative surfaces |
| 55° | 2.08 m | Wide coverage | Large surfaces and display areas |
The table above presents a geometric comparison rather than actual measurements from the SVS-1075 luminaire. When comparing lighting effects through photographs, the fixture version, wattage, color temperature, distance, target object, and camera settings should remain consistent. Changing only the optical components may affect both the illuminated area and the luminous intensity on the surface.
15-Degree Spotlight Beam Angle
A 15-degree spotlight beam angle is worth considering when light needs to be concentrated on small details, such as sculptures, individual products, or decorative objects positioned within a larger space. The narrow beam helps define the focal area and distinguish it from the surrounding ambient lighting.
At a distance of 2 m, the estimated geometric beam diameter is approximately 53 cm. If the object is larger than this area, the spotlight may illuminate only its central portion. Excessively concentrated lighting can create harsh highlights while leaving other parts of the object insufficiently illuminated.
When selecting a 15° beam angle, both the illuminated area and the illuminance on the object should be evaluated. A narrow beam should not automatically be considered superior simply because it produces stronger visual contrast.
24-Degree Spotlight Beam Angle
A 24-degree spotlight beam angle provides a wider illuminated area than a 15° beam while maintaining a relatively focused distribution. It can be considered for wall-mounted artwork, decorative vases, or medium-sized display products.
At a distance of 2 m, the estimated beam diameter is approximately 85 cm. If the artwork or object is close to this size, the outer edges of the beam should be evaluated to prevent insufficient illumination around the artwork’s borders or uneven lighting distribution.
For reflective objects, such as framed artwork with glass, the aiming direction and viewing position should also be considered before finalizing the beam angle.
36-Degree Spotlight Beam Angle
A 36-degree spotlight beam angle provides broader light coverage and may be suitable for large paintings, decorative material surfaces, or display areas where multiple details need to be illuminated within the same zone.
At a distance of 2 m, the estimated geometric beam diameter is approximately 1.30 m. For medium-sized objects, a 36° beam can help prevent light from being concentrated on only a small portion of the surface. However, unwanted light spill onto adjacent walls and objects should still be assessed.
In spaces with multiple spotlights, overlapping beams can increase coverage but may also reduce contrast between objects if not carefully controlled.
55-Degree Spotlight Beam Angle
A 55-degree spotlight beam angle produces a considerably wider beam than the other options. It may be considered when illuminating large wall sections, groups of objects, or display spaces that require less concentrated lighting.
At the same distance of 2 m, the geometric beam diameter is approximately 2.08 m. For small objects, this broad distribution may spill onto surrounding walls, ceiling features, or nearby furniture, reducing the visual prominence of the intended focal point.
Therefore, a 55° beam angle should not be selected solely to achieve greater coverage. The decision should be based on the desired illuminated area, illuminance requirements, and the relationship between the object and its surroundings.
How to Choose a Spotlight Beam Angle Based on Object Size and Distance
When choosing a spotlight beam angle based on distance, architects should not begin with the number of fixtures or a predetermined beam angle. Instead, they should first identify the dimensions of the object, the installation position, and the lighting objectives. These factors provide the foundation for selecting a suitable configuration and minimizing adjustments after installation.
Determine the Object Dimensions and Required Illuminated Area
First, measure the width, height, and depth of the object. For wall-mounted paintings, distinguish between the dimensions of the frame and the artwork itself. For sculptures or three-dimensional objects, determine which surfaces should receive priority illumination.
For example, a painting measuring 80 cm wide and 60 cm high should be evaluated based on all four corners rather than its width alone. If the objective is to illuminate the entire painting, the beam diameter should include an appropriate margin, and illuminance at the edges should be checked.
If the goal is to highlight only a small detail, a narrow beam may be more effective. Conversely, when the intention is to reveal the overall material texture or shape of an object, a wider beam angle or a combination of multiple luminaires should be evaluated.
Measure the Distance Between the Spotlight and the Object
Distance directly affects the size of the illuminated area. With the same spotlight beam angle, increasing the distance results in a larger geometric beam diameter. Conversely, positioning the spotlight closer to the object reduces the illuminated area and may significantly change the illuminance on the surface.
For perpendicular illumination, the distance from the light source to the target plane can be used for estimation. However, spotlights used to illuminate artwork are often mounted on ceilings and aimed diagonally toward walls. Therefore, ceiling height alone should not be used as the calculation distance.
For example, with a 24° beam angle, the geometric beam diameter is approximately 0.43 m at a distance of 1 m and 0.85 m at 2 m. When the beam strikes a surface at an angle, however, the illuminated area may become elongated and asymmetrical.
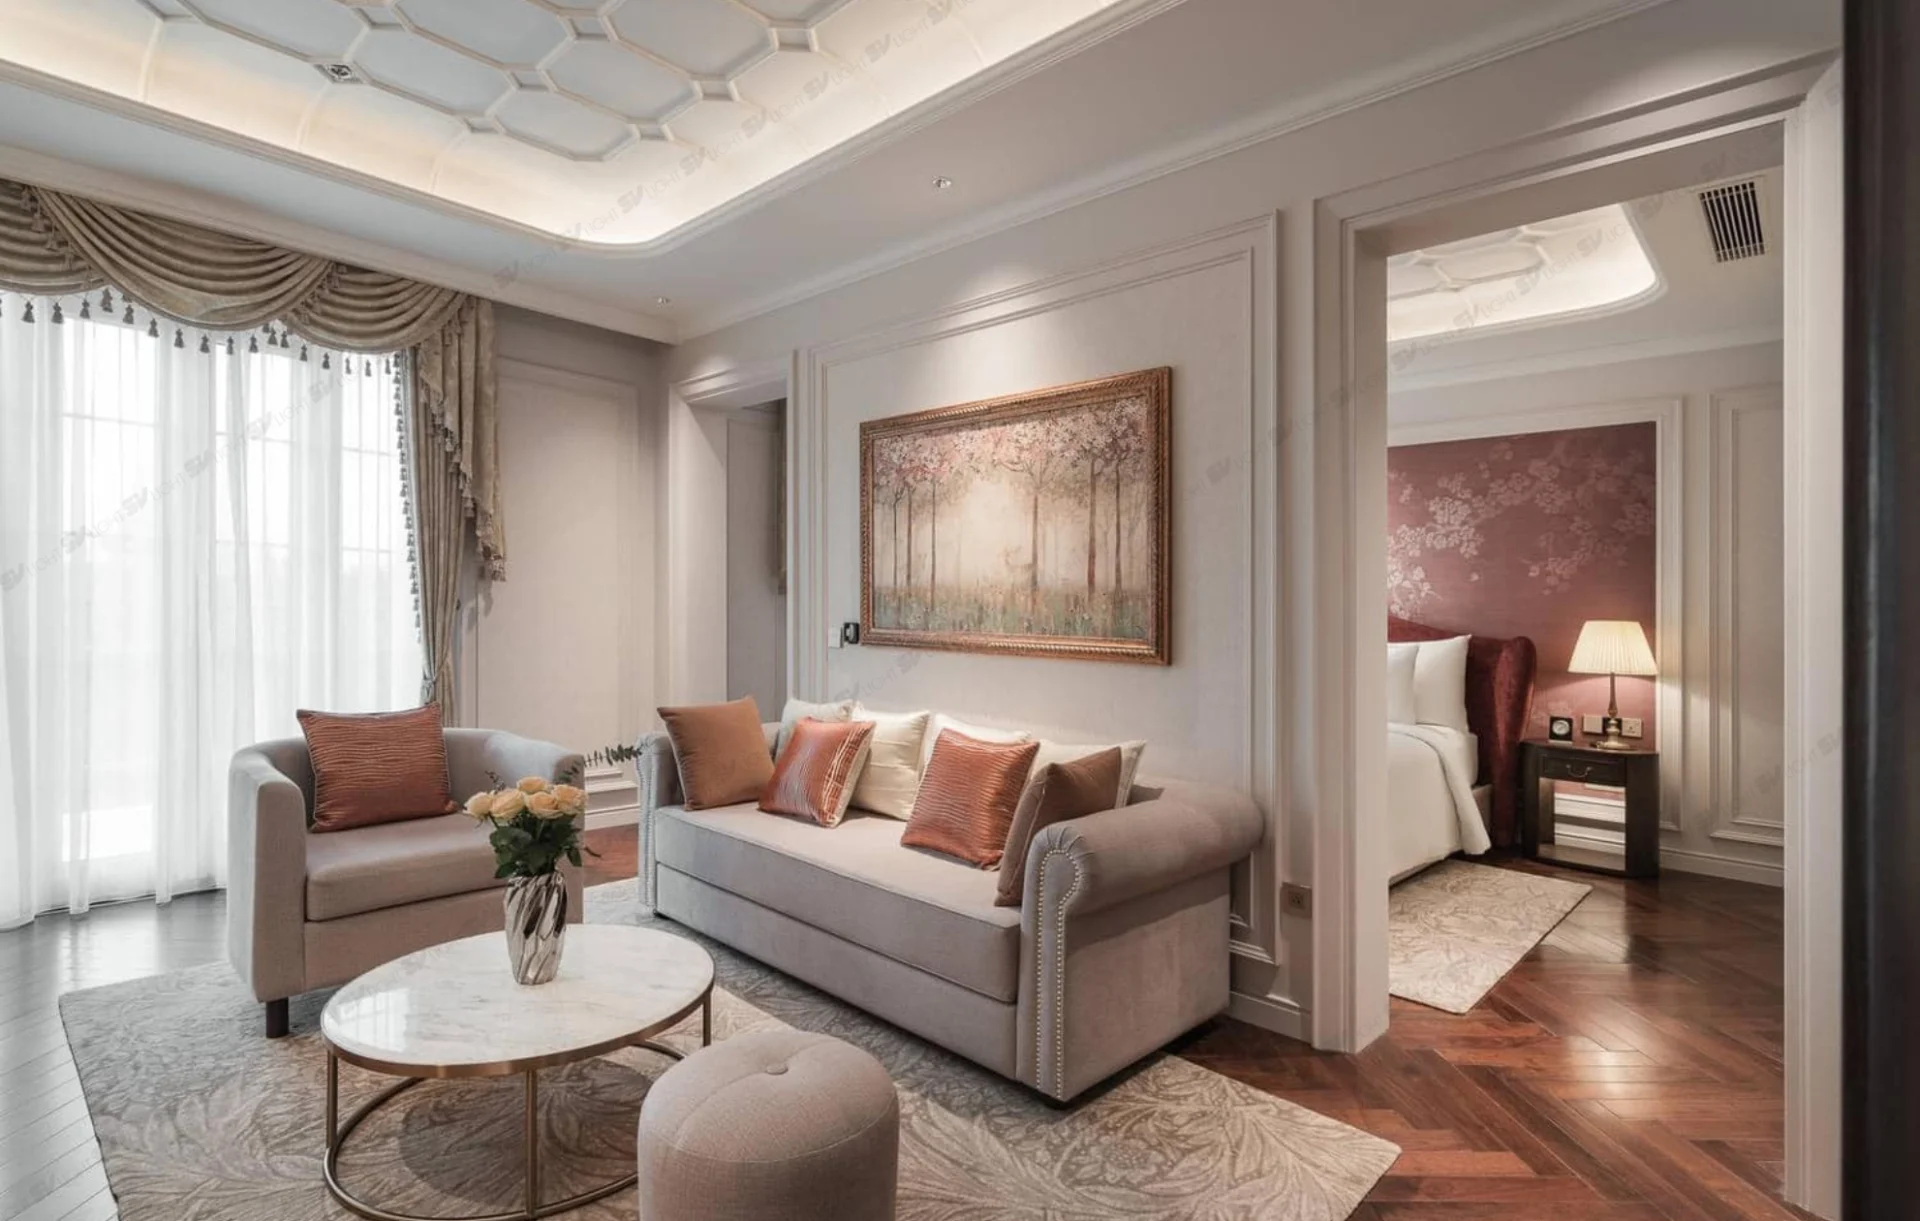
Match the Beam Coverage to the Desired Accent and Ambient Lighting
After determining the object dimensions and lighting distance, the design objective should be clearly defined. This may involve highlighting a small detail, illuminating an entire object, or creating a soft pool of light on a wall. Each objective requires a different balance of beam angle, illuminance, and contrast.
Ambient lighting also affects how prominently an accent is perceived. If the entire space is already brightly illuminated, spotlight placement and distribution should allow the object to stand out without causing glare. In darker environments, an excessively concentrated beam may create uncomfortable visual contrast.
When spotlights produce unwanted light spill, the beam angle, aiming direction, and installation distance should be checked before reducing wattage. Switching to narrower optics or adjusting the fixture position may provide better control over the illuminated area, depending on the application.
Examples of Choosing Spotlight Beam Angles for Different Applications
A particular spotlight beam angle may work well for artwork but may not be suitable for decorative niches or display areas. When selecting a beam angle, installation conditions, object dimensions, and viewing directions should be carefully evaluated rather than applying the same beam angle to every area.
Choosing the Right Beam Angle for Artwork Lighting
When choosing a spotlight beam angle for artwork, it is essential to consider the artwork’s dimensions, the distance between the fixture and the wall, and the viewing angle. If the beam is too narrow, light may be concentrated only in the center, leaving the edges or corners insufficiently illuminated. Conversely, an excessively wide beam may cause unwanted light spill onto the surrounding wall.
For example, consider a painting measuring 80 × 60 cm, illuminated perpendicularly from a hypothetical distance of 2 m. A 15° beam produces a diameter of approximately 53 cm, which is insufficient to cover the entire painting. A 24° beam produces approximately 85 cm, but this may still not provide adequate coverage at all four corners. A 36° beam produces approximately 130 cm and may serve as an initial option for evaluation when broader coverage is required.
In practice, artwork is usually illuminated at an angle from ceiling-mounted fixtures. Therefore, the shape of the illuminated area, lighting uniformity, and reflections from protective glass should be evaluated. Projects requiring accurate color reproduction should also consider the color rendering index (CRI) and the overall light quality of the luminaire.
The SVS-1275T Adjustable Spotlight is one option worth considering. This 12W model offers beam angles of 15°, 24°, and 36°. It provides a useful reference when evaluating lighting configurations that require the beam to be directed toward artwork or decorative surfaces.
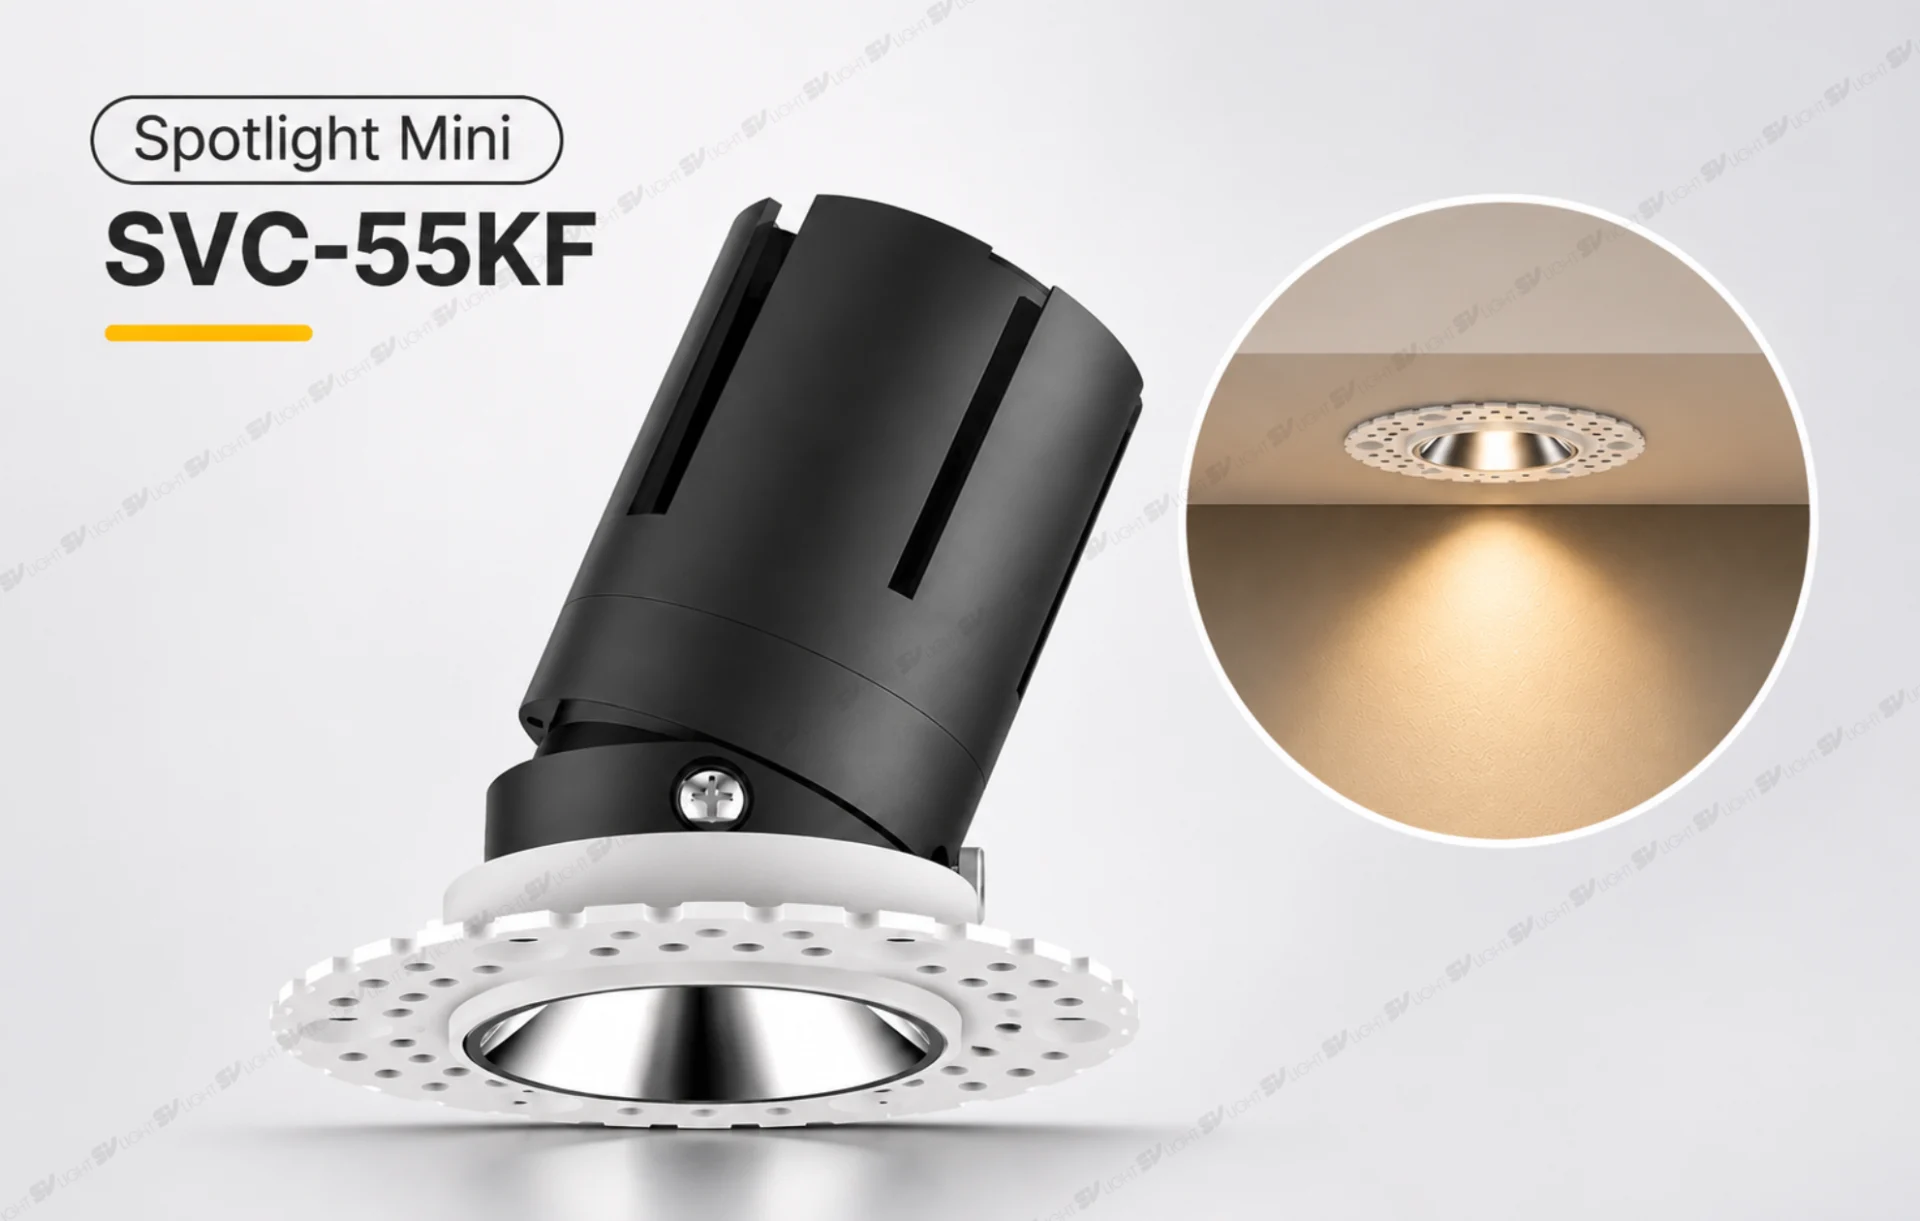
Choosing a Mini Spotlight Beam Angle for Niches and Shelves
For decorative niches, glass cabinets, and interior shelving, selecting the appropriate mini spotlight beam angle requires consideration of the niche width and depth, object placement, and the distance between the light source and the target surface. Not every small niche requires a 15° beam angle. If the fixture is positioned very close to the object, the illuminated area may become too small.
If the goal is to highlight a small sculpture, a narrow beam may be appropriate. For decorative vases or larger groups of objects, beam angles of 24°, 25°, or 35° may be worth evaluating, depending on the specifications of the selected luminaire.
One SVLight product worth considering is the SVC-55KF Mini Spotlight. According to its product specifications, this luminaire is available in 6W and 9W versions, with beam angle options of 15°, 20°, 25°, and 35°. These configurations can be compared to determine suitable lighting effects for small to medium-sized decorative objects.
In addition to beam angle, the luminaire dimensions, ceiling cutout size, heat dissipation, material reflectance, and viewing direction of people standing near the shelves should be checked. A configuration that looks attractive in a design drawing must also be compatible with actual installation conditions.
Choosing Spotlight Beam Angles for Display Areas
For showrooms, retail stores, and exhibition spaces, selecting the appropriate spotlight beam angle should be based on product dimensions and the arrangement of individual display areas. A single product may require a concentrated beam, while a group of objects or a large display surface may benefit from wider light coverage.
For display areas where products or layouts change frequently, adjustable aiming or variable beam angles may be considered. This flexibility allows the lighting arrangement to adapt more effectively when objects are repositioned.
Within the SVLight product range, the SVS-Z0745 Zoomable Spotlight has a power rating of 7W and an adjustable beam angle ranging from 8° to 24°, according to its product page. This model provides an example for applications requiring variable beam spread, although the installation distance and object dimensions must still be evaluated.
When multiple luminaires are used, beam overlap, illuminance on objects, shadows, and contrast with the background should be assessed. If every object is illuminated equally brightly, the space may lack visual hierarchy despite having a high overall light level.
Checklist Before Selecting a Spotlight Beam Angle
- Determine the width, height, and depth of the object.
- Measure the actual distance between the luminaire and the target surface.
- Check the aiming direction and mechanical adjustment capabilities.
- Define the desired lighting effect: highlighting a specific detail or illuminating the entire object.
- Evaluate ambient lighting, reflective materials, and viewing directions.
- Confirm the luminaire model, beam angle, driver, and installation requirements.
When evaluating spotlight beam angles, there is no single option that works best in every situation. A 15° beam may be suitable for small focal points, while 24°, 36°, and 55° beam angles provide different levels of coverage. The key is to select the right beam angle for the intended lighting task, avoiding excessively narrow or wide beams and unwanted light spill into surrounding areas.
For projects with demanding requirements for illuminance, uniformity, and light quality, lighting calculations should be combined with photometric data for the exact luminaire configuration and on-site testing. Preparing floor plans, object dimensions, and installation positions from the beginning can help reduce the risk of configuration changes after installation.
Get Expert Advice on Spotlight Beam Angles and Lighting Configurations from SVLight
Architects, lighting designers, and contractors can provide floor plans, sectional drawings, ceiling heights, artwork or object dimensions, and their desired lighting effects when contacting SVLight for lighting design consultation. If a particular luminaire model has already been selected, additional information about its optical system and installation position should be provided to support a more accurate beam angle assessment.
SUNSHINE VIETNAM TRADING JOINT STOCK COMPANY
Ho Chi Minh City: No. 08, B4 Street, An Khanh Ward, Ho Chi Minh City, Vietnam
Hanoi: No. 116 Truong Chinh Street, Kim Lien Ward, Hanoi, Vietnam
Hotline: 0985 85 86 98
Email: svlight.vn@gmail.com
Website: www.svlight.vn
Other News
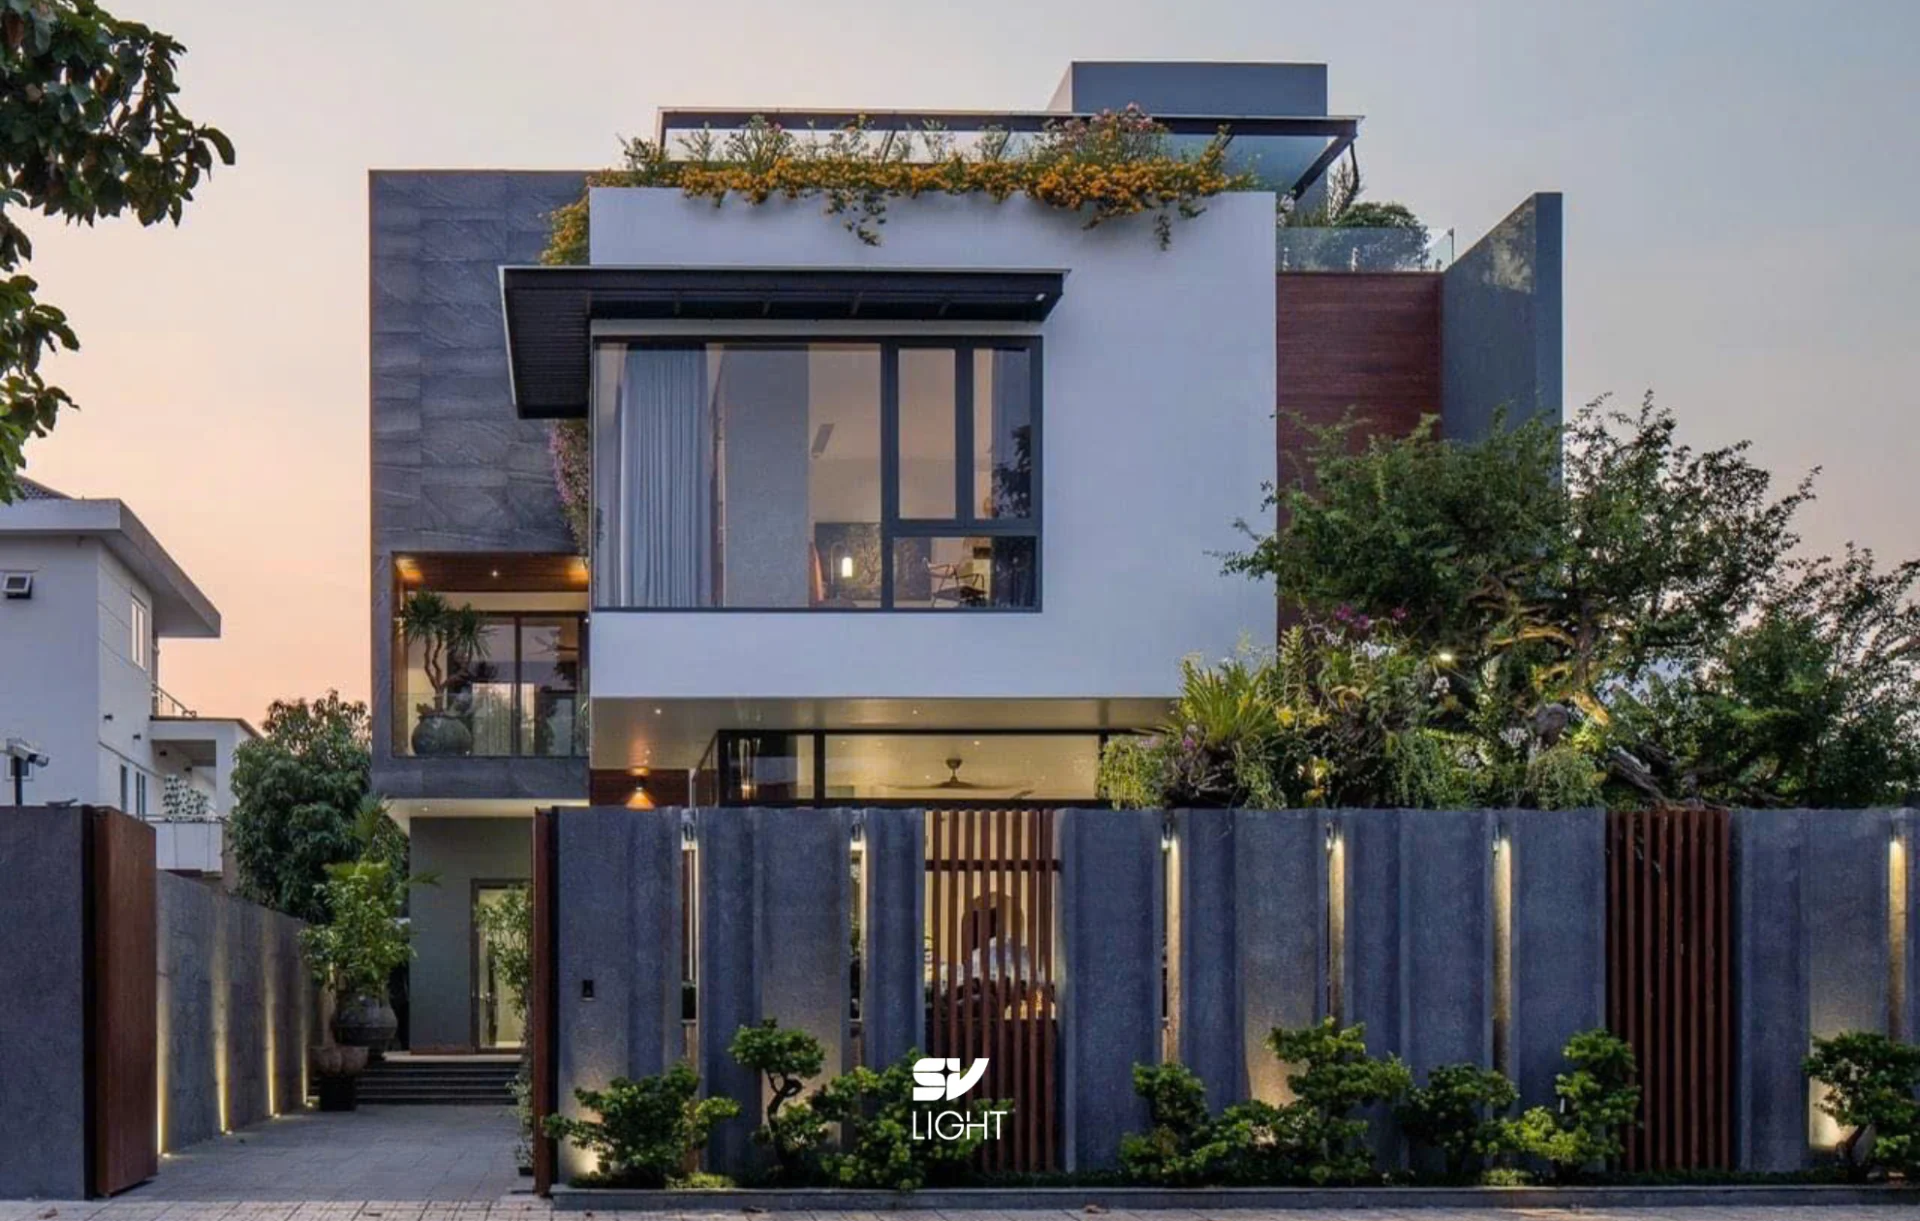
Trimmed and trimless recessed lights are two options commonly considered by architects when designing interior lighting. While trimmed recessed lights create a defined edge where the fixture meets the ceiling, trimless recessed lights provide a seamless, minimalist appearance by reducing visible technical details on the architectural surface. However, choosing between these two types of lighting […]
Interior showroom lighting not only meets the needs of visibility and circulation but also helps highlight the shapes, colors, and materials of individual products. A well-planned lighting system can help customers clearly appreciate sofa upholstery, wood grain, stone surfaces, and important design details. In particular, showrooms frequently change their displayed products according to new collections […]
How to position artwork lighting directly affects how clearly artwork can be viewed and how an interior space is perceived. A beautiful painting can become a focal point in a villa living room, hotel corridor, or exhibition area. However, if the lighting position is unsuitable, it may cast shadows from the frame, create uneven illumination, […]
Color Rendering Index (CRI) is one of the important specifications to consider when selecting LED lighting for interior spaces, especially in areas where accurate color appearance is essential, such as artwork, wooden wall panels, natural stone, fabrics, and displayed products. Even a well-designed interior featuring beautiful materials and a carefully planned lighting layout may fail […]
3000K and 4000K lighting are two popular color temperature options in interior lighting design. While 3000K generally produces a warm white appearance, 4000K provides a more neutral white light. However, choosing between these two color temperatures is not simply a matter of deciding between yellowish and white light. It also requires careful consideration of functionality, […]
Downlights and spotlights are widely used in interior lighting, but they typically serve different purposes. Downlights provide a base layer of illumination, while spotlights draw attention to artwork, materials and architectural features. This guide focuses on recessed ceiling fittings: both can sit within the same ceiling design, yet their contribution to the room depends on […]
In interior design, lighting is more than just a tool that helps us see. It is a “language of emotion” — quietly shaping mood, perception, and the overall quality of human experience in every moment. Among all lighting specifications, CCT (Correlated Color Temperature) and CRI (Color Rendering Index) are the two core factors that determine […]
Những năm gần đây, xu hướng sở hữu nhà ở nghỉ dưỡng tránh xa ồn ào nơi phố thị đang ngày càng được ưa chuộng.
In recent years, the trend of owning vacation homes away from the hustle and bustle of the city has become increasingly popular.
This article shares insights from Mr. Damian de Wind, Project Lighting Director at Mondoluce, about the journey of transforming retail lighting methods in the context of shopping centers adopting a customer-centric approach, focusing on people, their needs, and the overall experience.
Light plays a crucial role in creating engaging environments, enhancing our living experiences.
In recent years, the trend of owning vacation homes away from the hustle and bustle of urban life has become increasingly popular.